
Don’t know how to change the font in Windows 11? Don’t fret, because this guide will provide details on how to change the font. Everyone wants something that is unique and says something about them, and If you want something other than the Windows 11 default font, you can customize it to your preference. The Windows 11 operating system has given users the ability to customize the font.
Although it isn’t as easy as it seems on older versions of Windows, nonetheless, it isn’t impossible. This blog post will teach you how to change the font in Windows 11 to any font you want. You can also change the color of the font to your preferred choice. Read through this blog post to know how to do it.
How to Change the Font in Windows 11
One of the fastest ways to change the Windows 11 font is through a Windows Registry edit. Follow the steps below to change it:
- Go to the control panel on your PC.
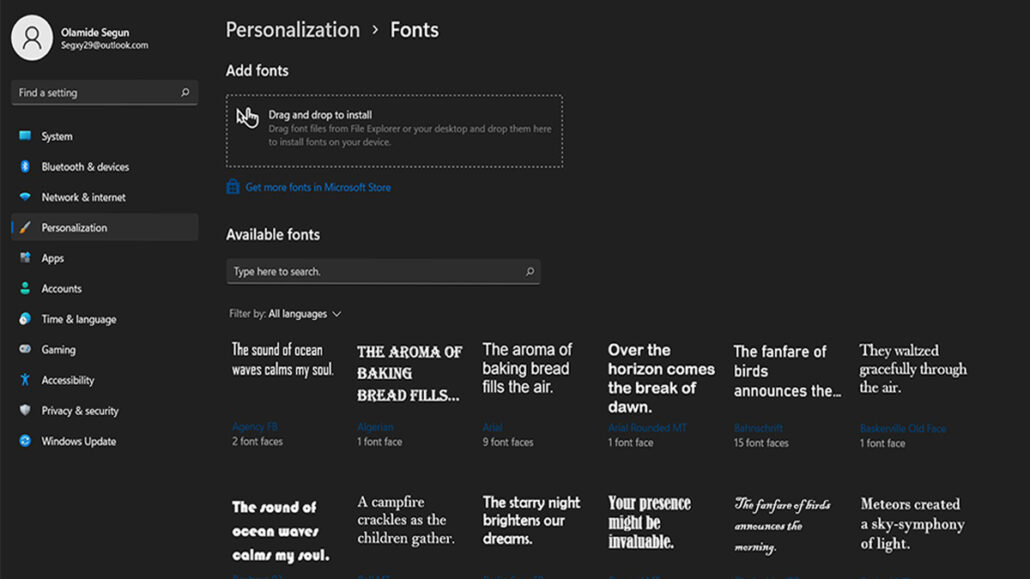
- Open your settings, and then choose Personalization on the left after choosing the font on the right.
- Scroll down to the Available Fonts section, then locate and choose the font that you are interested in using.
- Scroll through the styles and then choose a font that you like, and then double-click on it. If there are other fonts available, you can choose the one that you prefer.
- Then you open your notepad and write down the font name.
- Copy and paste the following:
Code to Copy
Windows Registry Editor Version 5.00
{HKEY_LOCAL_MACHINE\SOFTWARE\Microsoft\Windows NT\CurrentVersion\Fonts}
“Segoe UI (TrueType) “=””
“Segeo UI Bold(TrueType)”=””
“Segoe UI Bold Italic (TrueType)”=””
“Segeo UI Italic (TrueType0”=”
“Segeo UI Semibold (TrueType)”=””
“Segeo UI Symbol (TrueType)”=””
HKEY_LOCAL_MACHINE\SOFTWARE\Microsoft\Windows NT\CurrentVersion\FontSubstitutes}
- In the last line of the documents, you can change the name of the font you chose to match the font name you selected earlier.
- Also, if you are using Notepad, you can head over to the file and choose to Save As, and then type a name in the file name box.
- Select All Files from the Save As Type menu.
- Enter .reg at the bottom of the file name.
- Select where on your computer to save the file, and then choose Save.
- Close the text editor, and double-click the REG file from the folder you saved it to.
- Tap Yes on the user account control windows, then Yes again on the Registry Editor prompt, and then tap OK on the success message.
- Then reboot your computer to check out the font changes. The fastest way is to right-click the Start button or shut down the computer.
And there you have it. You have successfully changed the font in Windows 11.
How to Restore the Default Font in Windows 11
If you want to restore the fonts on your Windows 11 computer back to their original font, you have to reverse the registry tweak that changed the font in the first place. To do this, you have to repeat the steps from the beginning and replace the Notepad text with another code. This can be done in two ways, the first of which is much easier if you have the original REG file:
- Right-click the REG file from where it was previously saved and then choose Edit.
- Replace all of the text in the document with this.
Windows Registry Editor Version 5.00
{HKEY_LOCAL_MACHINE\SOFTWARE\Microsoft\Windows NT\CurrentVersion\Fonts}
“Segoe UI (TrueType) “=””segoeui.ttf”
“Segeo UI Black (TrueType)”=””seguibl.ttf”
“Segoe UI Black Italic (TrueType)”=””seguibli.ttf”
“Segeo UI Bold (TrueType)”=”segoeuib.ttf”
“Segeo UI Bold (TrueType)”=””segeouiz.ttf”
“Segeo UI Bold Italic (TrueType)”=””segoeuiz.ttf”
“Segeo UI Emoji (TrueType)”=””seguiemj.ttf”
“Segeo UI Historic (TrueType)”=””seguihis.ttf”
“Segeo UI Bold Italic (TrueType)”=””segoeuiz.ttf”
Segoe UI Italic (TrueType)”=”segoeuii.ttf”
“Segoe UI Light (TrueType)”=”segoeuil.ttf”
“Segoe UI Light Italic (TrueType)”=”seguili.ttf”
“Segoe UI Semibold (TrueType)”=”seguisb.ttf”
“Segoe UI Semibold Italic (TrueType)”=”seguisbi.ttf”
“Segoe UI Semilight (TrueType)”=”segoeuisl.ttf”
“Segoe UI Semilight Italic (TrueType)”=”seguisli.ttf”
“Segoe UI Symbol (TrueType)”=”seguisym.ttf”
“Segoe MDL2 Assets (TrueType)”=”segmdl2.ttf”
“Segoe Print (TrueType)”=”segoepr.ttf”
“Segoe Print Bold (TrueType)”=”segoeprb.ttf”
“Segoe Script (TrueType)”=”segoesc.ttf”
“Segoe Script Bold (TrueType)”=”segoescb.ttf”
[HKEY_LOCAL_MACHINE\SOFTWARE\Microsoft\WindowsNT\CurrentVersion\FontSubstitutes]
“Segoe UI”=-
- Navigate to File>Save.
- After leaving Notepad, run the REG file.
- Accept all prompts to edit the registry.
- Finally, Reboot your computer if the changes didn’t take effect.
If your original REG file is lost, you can repeat the steps located at the top of this page. When you reach the part about pasting the code into Notepad, you can make use of the modified code from Step 2 and don’t make any changes.
How to Change Font Color in Windows 11
Do you know that it is possible to change the font color in Windows 11? Well, it is. You can change the color and personalize the font to make it look more stylish. Follow the steps below to change the color of your Windows 11 font:
- Go to Settings, and then choose Personalization.
- Choose themes and then go to Contrast Themes.
- Then choose one of the themes provided in the drop-down menu.
- Tap on the Edit button.
- Then select the color box next to the field text.
- Enter the hex code or choose a color from the palette.
- Then, select Save As and enter a name for the theme.
- Then you wait for a few seconds for the system to change the font color on your screen.
And there you have it. You have successfully changed the font in Windows 11.